반응형
https://survivalcoding.com/p/android_basic
될 때까지 안드로이드
될 때까지 안드로이드에 수록된 예제의 라이브 코딩 해설
survivalcoding.com
위 서적을 참고하였습니다.
값을 입력받아 다른 Activity로 입력받은 값을 넘기는 앱을 만들어 봅시다.
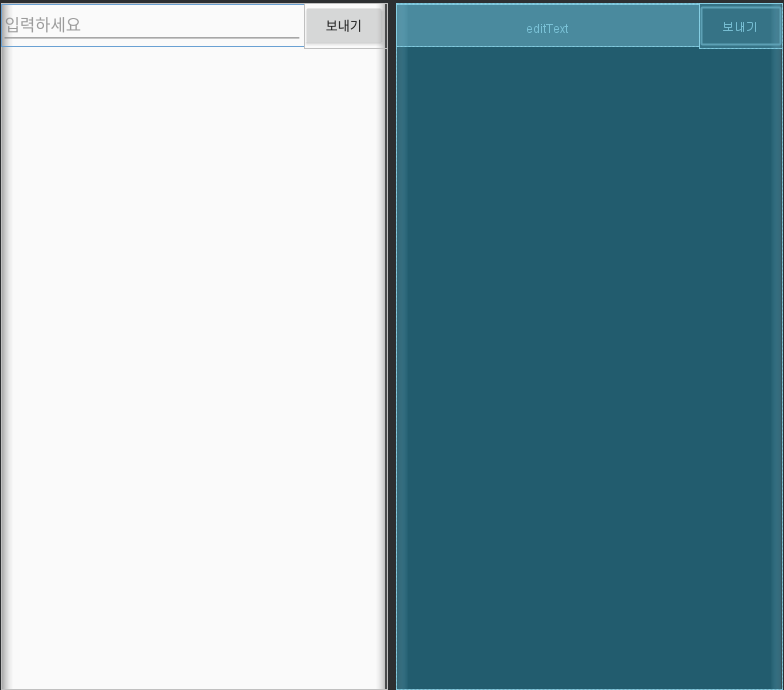
먼저 MainActivity에서 값을 보낼 layout을 만들어 봅시다. (activity_main.xml)
<?xml version="1.0" encoding="utf-8"?>
<LinearLayout xmlns:android="http://schemas.android.com/apk/res/android"
    xmlns:app="http://schemas.android.com/apk/res-auto"
    xmlns:tools="http://schemas.android.com/tools"
    android:layout_width="match_parent"
    android:layout_height="match_parent"
    tools:context=".MainActivity"
    android:orientation="horizontal">

    <EditText
        android:id="@+id/editText"
        android:layout_weight="1"
        android:layout_width="0dp"
        android:layout_height="wrap_content"
        android:hint="@string/hint"/>

    <Button
        android:id="@+id/sendBtn"
        android:layout_width="wrap_content"
        android:layout_height="wrap_content"
        android:onClick="sendMessage"
        android:text="@string/sendMessage"/>

</LinearLayout>
<resources>
    <string name="app_name">Study</string>
    <string name="hint">입력하세요</string>
    <string name="sendMessage">보내기</string>
</resources>
strings.xml 파일입니다. 여러분들의 입맛에 맞춰 바꾸셔도 됩니다.
그리고 값을 전달받고 출력해줄 레이아웃을 만들어 줍니다. (activity_put_extra_example.xml)
<?xml version="1.0" encoding="utf-8"?>
<LinearLayout xmlns:android="http://schemas.android.com/apk/res/android"
    xmlns:app="http://schemas.android.com/apk/res-auto"
    xmlns:tools="http://schemas.android.com/tools"
    android:layout_width="match_parent"
    android:layout_height="match_parent"
    tools:context=".putExtraExample"
    android:orientation="vertical">

    <TextView
        android:id="@+id/textView"
        android:layout_width="wrap_content"
        android:layout_height="wrap_content"/>

</LinearLayout>
이제 MainActivity로 넘어가서 EditText 객체를 생성하고 Intent와 putExtra()를 사용하여 다른 클래스로 넘겨줄 겁니다.
(MainActivity.java)
package hello.world.study;
import androidx.appcompat.app.AppCompatActivity;
import android.content.Intent;
import android.os.Bundle;
import android.view.View;
import android.widget.EditText;
public class MainActivity extends AppCompatActivity {
EditText editText;
@Override
protected void onCreate(Bundle savedInstanceState) {
super.onCreate(savedInstanceState);
setContentView(R.layout.activity_main);
}
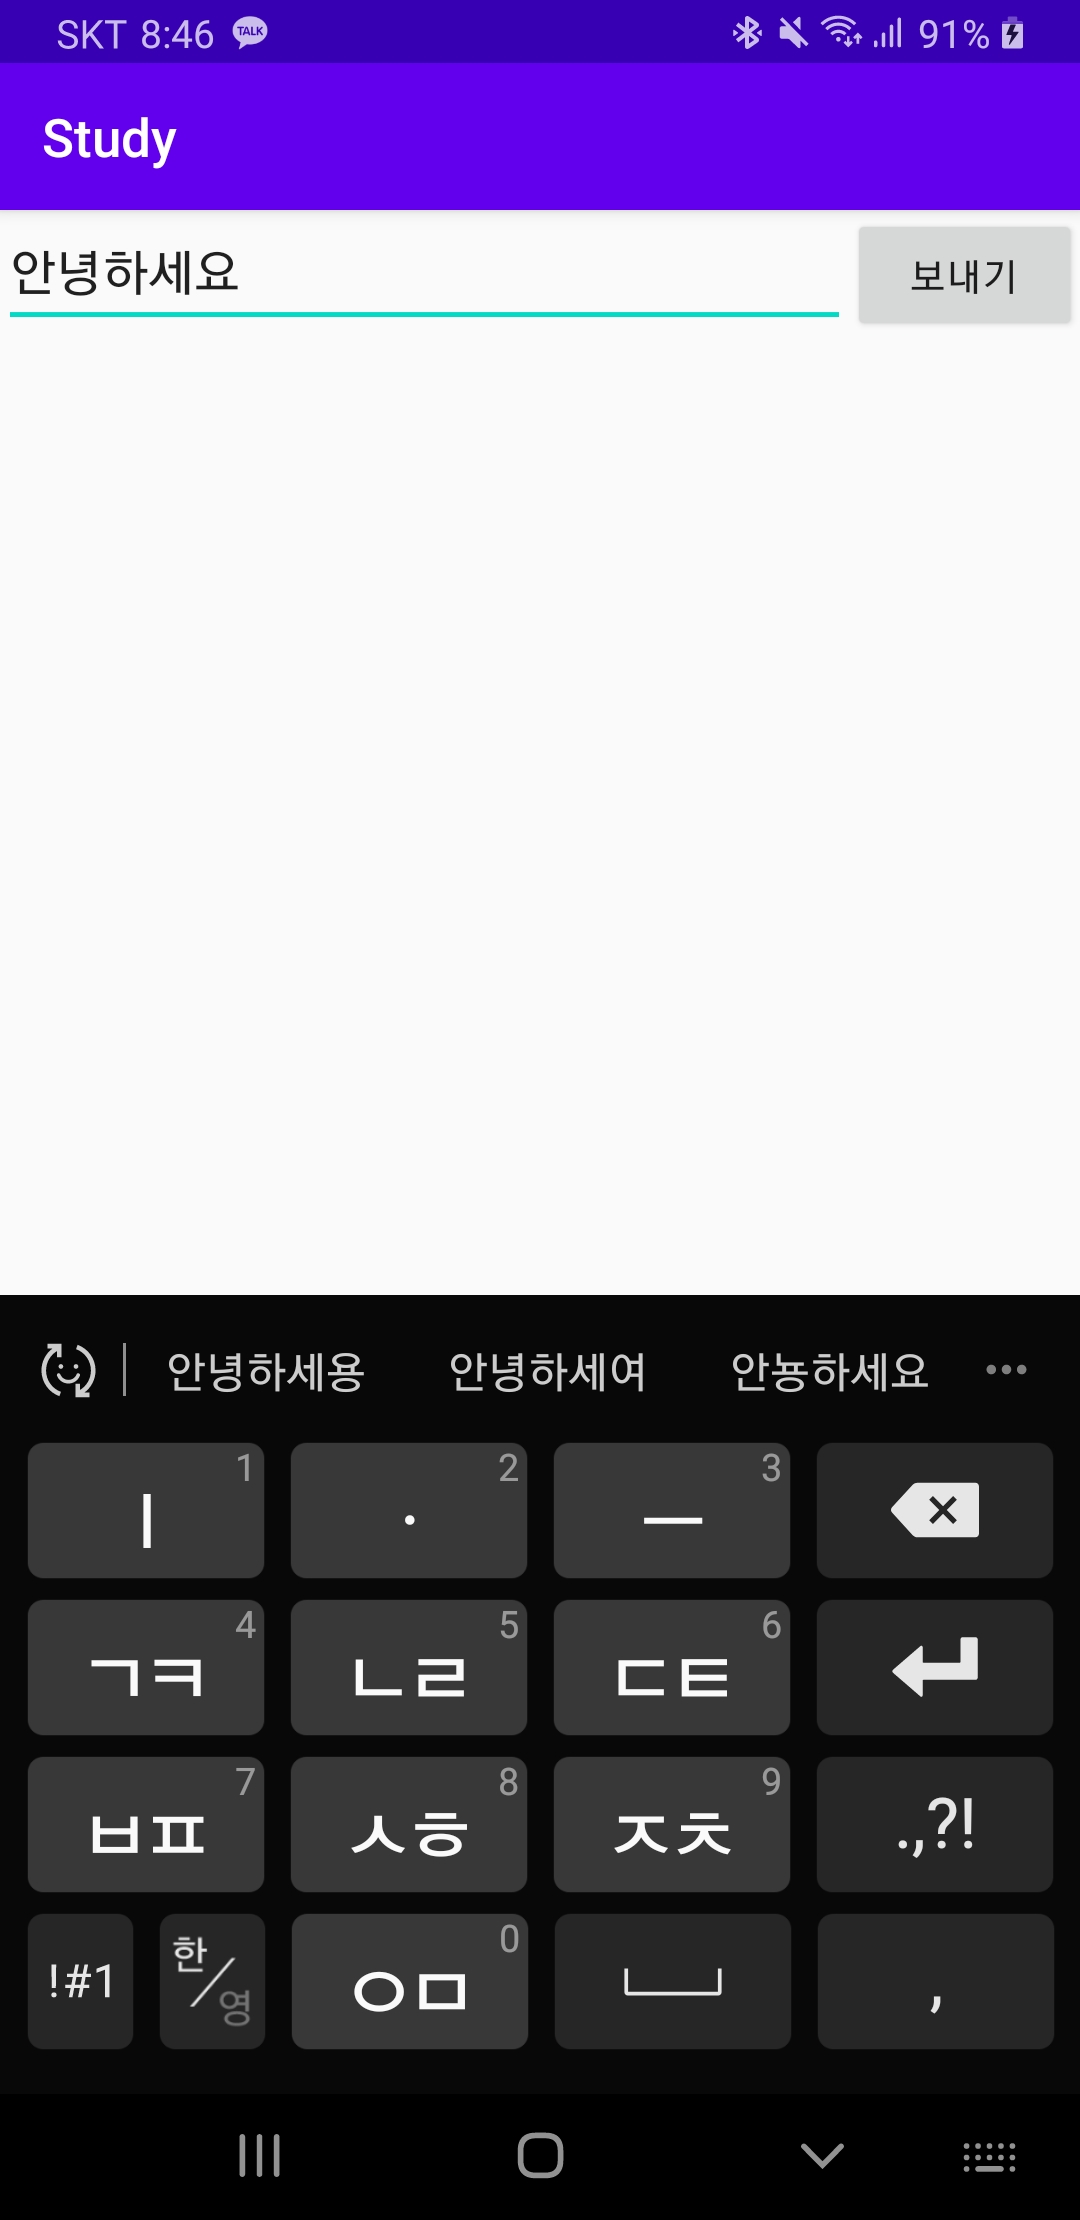
public void sendMessage(View view) {
editText = (EditText) findViewById(R.id.editText);
final String text = editText.getText().toString();
Intent sendIntent = new Intent(this, putExtraExample.class);
sendIntent.putExtra("message", text);
startActivity(sendIntent);
}
}
그다음 putExtra()로 전달한 값을 getStringExtra()로 receiveMessage 변수에 저장해 TextView에 출력을 하는 Activity를 작성합니다. (putExtraExample.java)
package hello.world.study;

import androidx.appcompat.app.AppCompatActivity;
import android.content.Intent;
import android.os.Bundle;
import android.widget.TextView;

public class putExtraExample extends AppCompatActivity {

    TextView textView;

    @Override
    protected void onCreate(Bundle savedInstanceState) {
        super.onCreate(savedInstanceState);
        setContentView(R.layout.activity_put_extra_example);

        Intent receiveIntent = getIntent();
        String receiveMessage = receiveIntent.getStringExtra("message");
        textView = (TextView) findViewById(R.id.textView);
        textView.setTextSize(40);
        textView.setText(receiveMessage);
    }
}
 |
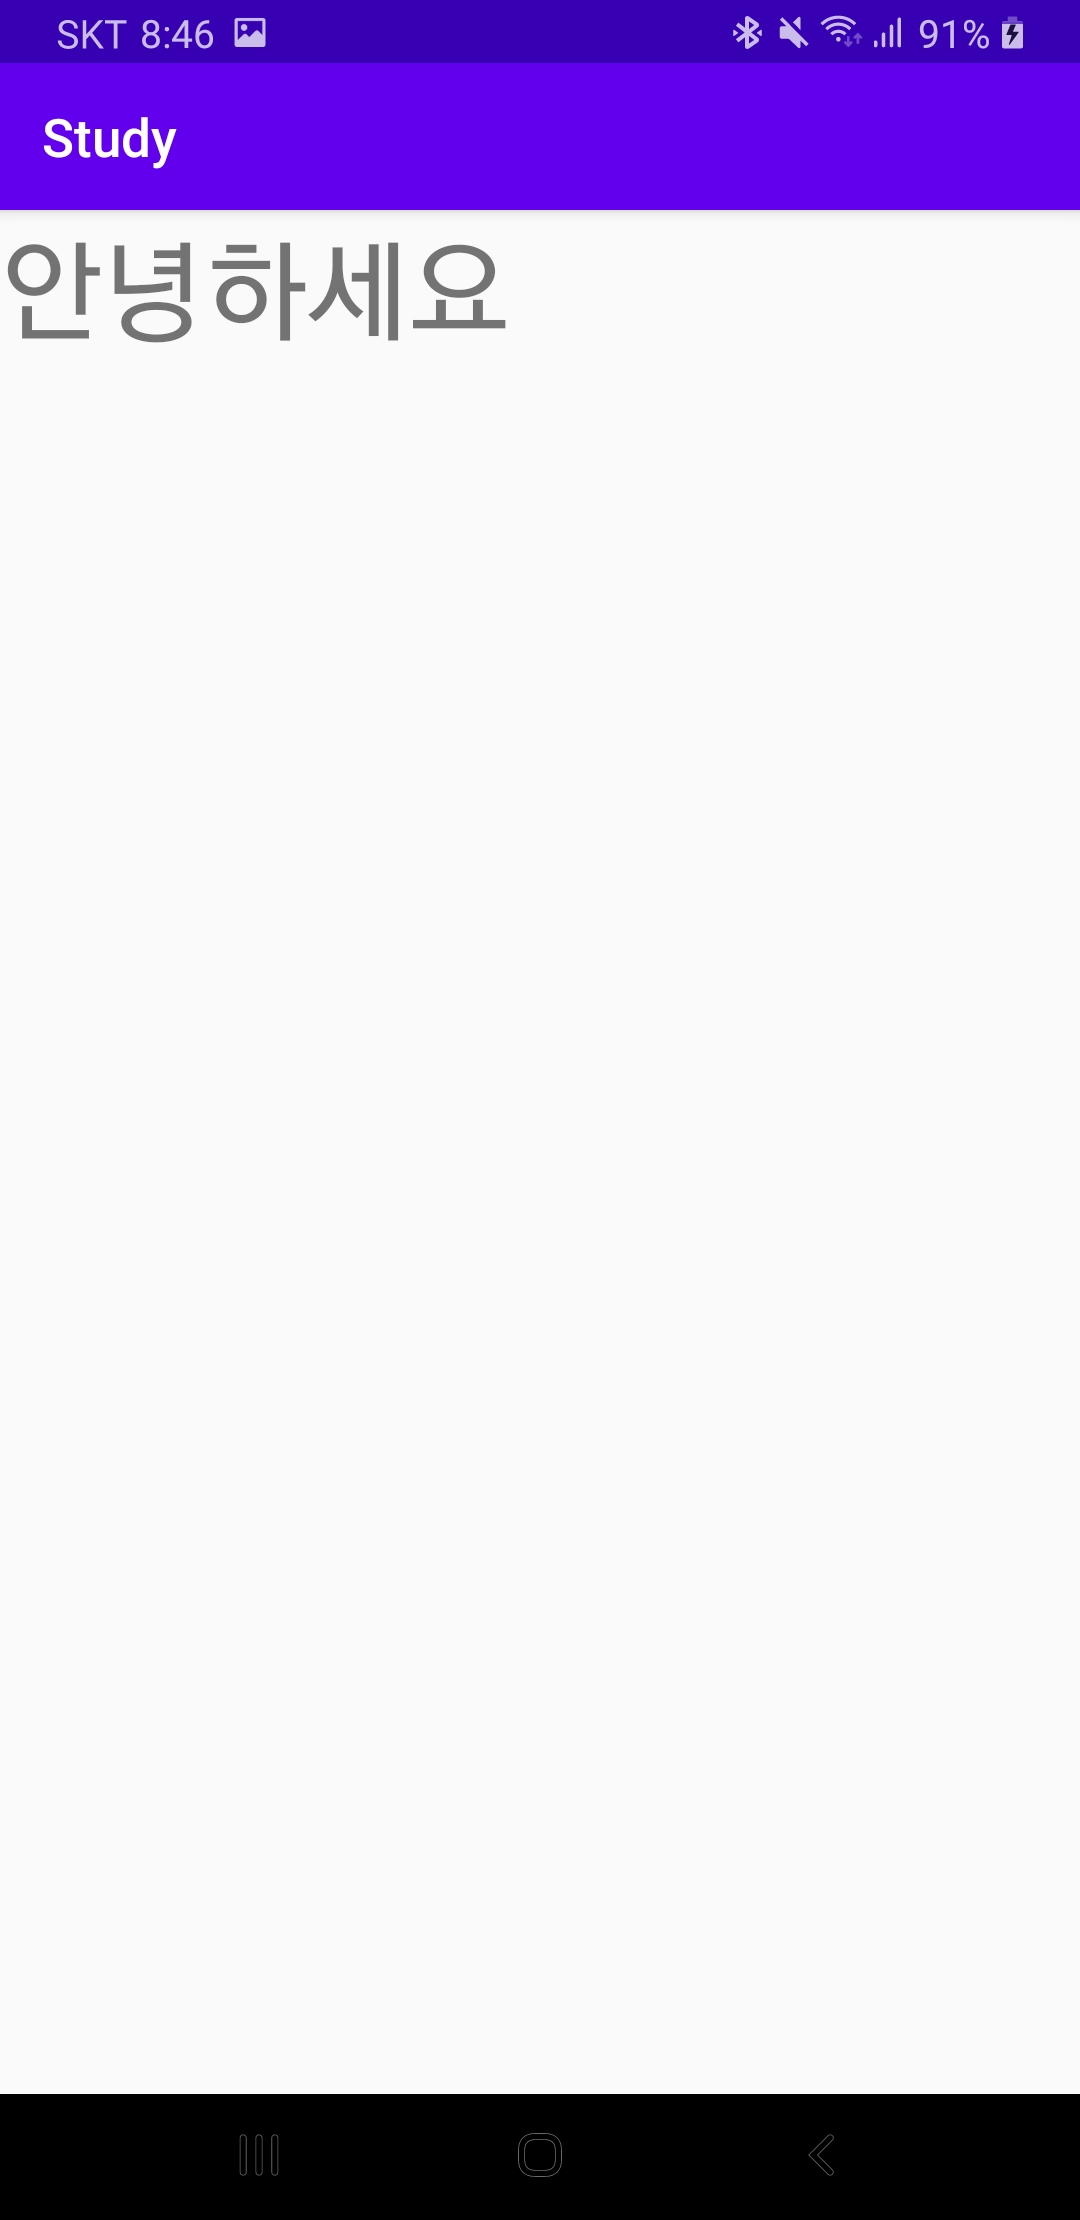 |
정상적으로 작동하는 것을 볼 수 있습니다. 감사합니다.
반응형
'Android > Android' 카테고리의 다른 글
| [Android] 안드로이드 Adapter와 AdapterView, BaseAdapter (1) (0) | 2020.06.10 |
|---|---|
| [Android] 안드로이드 리스트뷰 모서리 둥글게 만들기 (0) | 2020.06.09 |
| [Android] 안드로이드 화면 전환 간 데이터 주고받기 (0) | 2020.06.07 |
| [Android] 안드로이드 스튜디오 프로젝트 구성 요소 살펴보기 (0) | 2020.06.05 |
| [Android] 안드로이드 스튜디오 프로젝트 생성 (0) | 2020.06.03 |